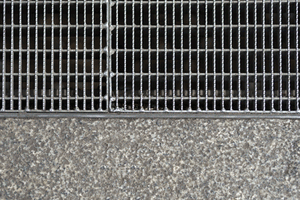
In order to prevent your channel drain from becoming blocked with leaves, branches, or other debris, it is typically covered with a channel drain grate. That is why checking occasionally if you need channel drain grate replacement is such an important step for you that will save from unnecessary expenses. Additionally, the grate makes it simple to cross on foot. The drain itself serves as a barrier between your house or garden and surface or subterranean water. To keep the drain operating as it should, again, make sure to check you grate if it needs channel drain grate replacement
STEPS ON DOING CHANNEL DRAIN GRATE REPLACEMENT

1. Check your channel drain size
Before buying new grates for your channel drain grate replacement make a note of the channel drain's width and length using a measuring tape. Remember that the grate will need to be placed at the drain’s margins. Use the old grate's measurements as a reference.
2. Pick your drain grate
Visit a drain grate manufacturer and select the drain grates. You can use practically any material, from plastic grates to galvanized driveway grates, in your yard and close to your home—areas with very little traffic. The grate's hole designs are also crucial. The drain is more effective because debris may flush through the system more easily with wider holes and more open space. Smaller holes will also require more frequent cleaning.
3. Clean the drain
Always clean your channel drain if you are doing channel drain grate replacement. The lockdown screws can be taken out with your hands or a screwdriver. To remove the grating, turn out the lockdown plate and the lockdown bars. Old grates should be raised and set aside. Clean the drain with a powerful water jet using a garden hose that is linked to a water source. If required, clean up all the dirt with a mop. While maintaining the drain’s functionality may require a lot of cleaning, it is vital. Additionally, look for any obstructions along the path. Remember that certain locations in the drain could result in obstruction. If you experience issues with the draining system, check them first.
4. Install your new channel drain grate replacement
One of the screws that came with the grates should be inserted into the lockdown bar through the top side of the lockdown plate, which is welded to the underside of the grating. Turn once or twice. Once each lockdown plate is secured to the grate, carry out this procedure for each of them. The lockdown bars should be turned parallel to the channel drain. Reinstall the grate in the drain. Ensure that it is leveled and positioned properly. Until the grating is securely attached, tighten the lockdown screws with your hand. Verify that the lockdown bars have completely locked onto the frame.
IMPORTANCE OF DRAIN GRATES
You need top-notch grates to cover the drains if you want your drainage system to operate at its best. A high-performance grate enables quick water drainage and drain maintenance. The gratings keep bulky solid objects out of the drains since they could clog them. Drain grates that are chosen properly can help increase the curb appeal of your home. You can choose a color or pattern that goes well with your house or other landscape features. Additionally, reducing accidents on your property, drain grates. The drain system is easier to maintain because they are detachable. Ferrum’s drain grates combine aesthetics and beauty to provide a wide range of advantages.
CHOOSING THE RIGHT CHANNEL DRAIN GRATE REPLACEMENT
Consider the environment in which these installations will be used while selecting the material for your drain grates. Throughout their existence, the drain covers are subject to severe weather. Your drain grates must resist these extreme elements, including the summer heat, storms, hailstones in some areas, snow, and ice. The liquids going down the drains in some establishments are abrasive or corrosive. For instance, much of the sludge pouring down trench grates in a brewery or food processing factory contains chemicals that could harm the trench grates. These conditions should be withstood, and the finest materials for drain grates must have good weight bearing capacity.
These conditions should be withstood, and the finest materials for channel drain grate replacement must have good weight bearing capacity. The effect that these installations have on curb attractiveness is another justification for making meticulous grate material selections. The poor material selection might have a bad impact on your landscape. For instance, the grate system reduces the curb attractiveness of your earth-inspired landscaping if you choose brilliant color. In light of this knowledge, the following suggestions can help you choose the appropriate materials for your trench grates:
Think About Your Drainage Needs
Every facility is different, and everyone has different drainage needs. The proper handling of spills is the major priority for an industrial plant. The property managers are more worried about the drainage of flood water away from the structure at a parking lot for a retail store. Different grate materials aid in addressing various drainage requirements. Consider using highly resistant drain and grate materials if you anticipate that the drainage system will need to handle corrosive chemicals. Weather-resistant materials should be taken into consideration when purchasing grates for outdoor use.

Durability
Due to its unique metallurgical structure, a galvanized coating provides great resistance to mechanical damage during transit, erection, and service. The whole galvanized channel grate is secured, including all crevices and challenging access points. No coating can provide the same level of protection after a structure or manufacturing is complete.
Australian/New Zealand Standard 4680 is followed during galvanizing, and standard, minimal coating thicknesses are applied. Performance and lifespan of coatings are dependable and predictable.
Longevity
In most rural areas, the lifespan of galvanized channels, driveways, and drainage grates is greater than 50 years, and it can last even in tough urban and marine environments for 20 to 25 years or more.

